Wednesday, 28 October 2015

Ugly Vintage Dress Refashion


Yep, I'm calling it - this dress is UGLY.   
But for some reason I could not leave the opshop without it.


On arrival home I also realised it was see through - don't worry I have shorts on under it in this photo.
 And to top it off it had a funky vintage aroma that would not come out in the wash.  But after a quick google search on 'how to get rid of old people smell from clothes', and a 24 hour soak in water and white vinegar followed by another whirl through the washing machine it smelt as good as a newie.


After the vinegar soak it was time to make some alterations.
I look terrible in collars, so the collar was the first to go - which along with the sleeves were unpicked.


After unpicking, the two layers of fabric around the neck line were coming apart as you can see in the photo above.


So I pinned it like this before sewing it back together.
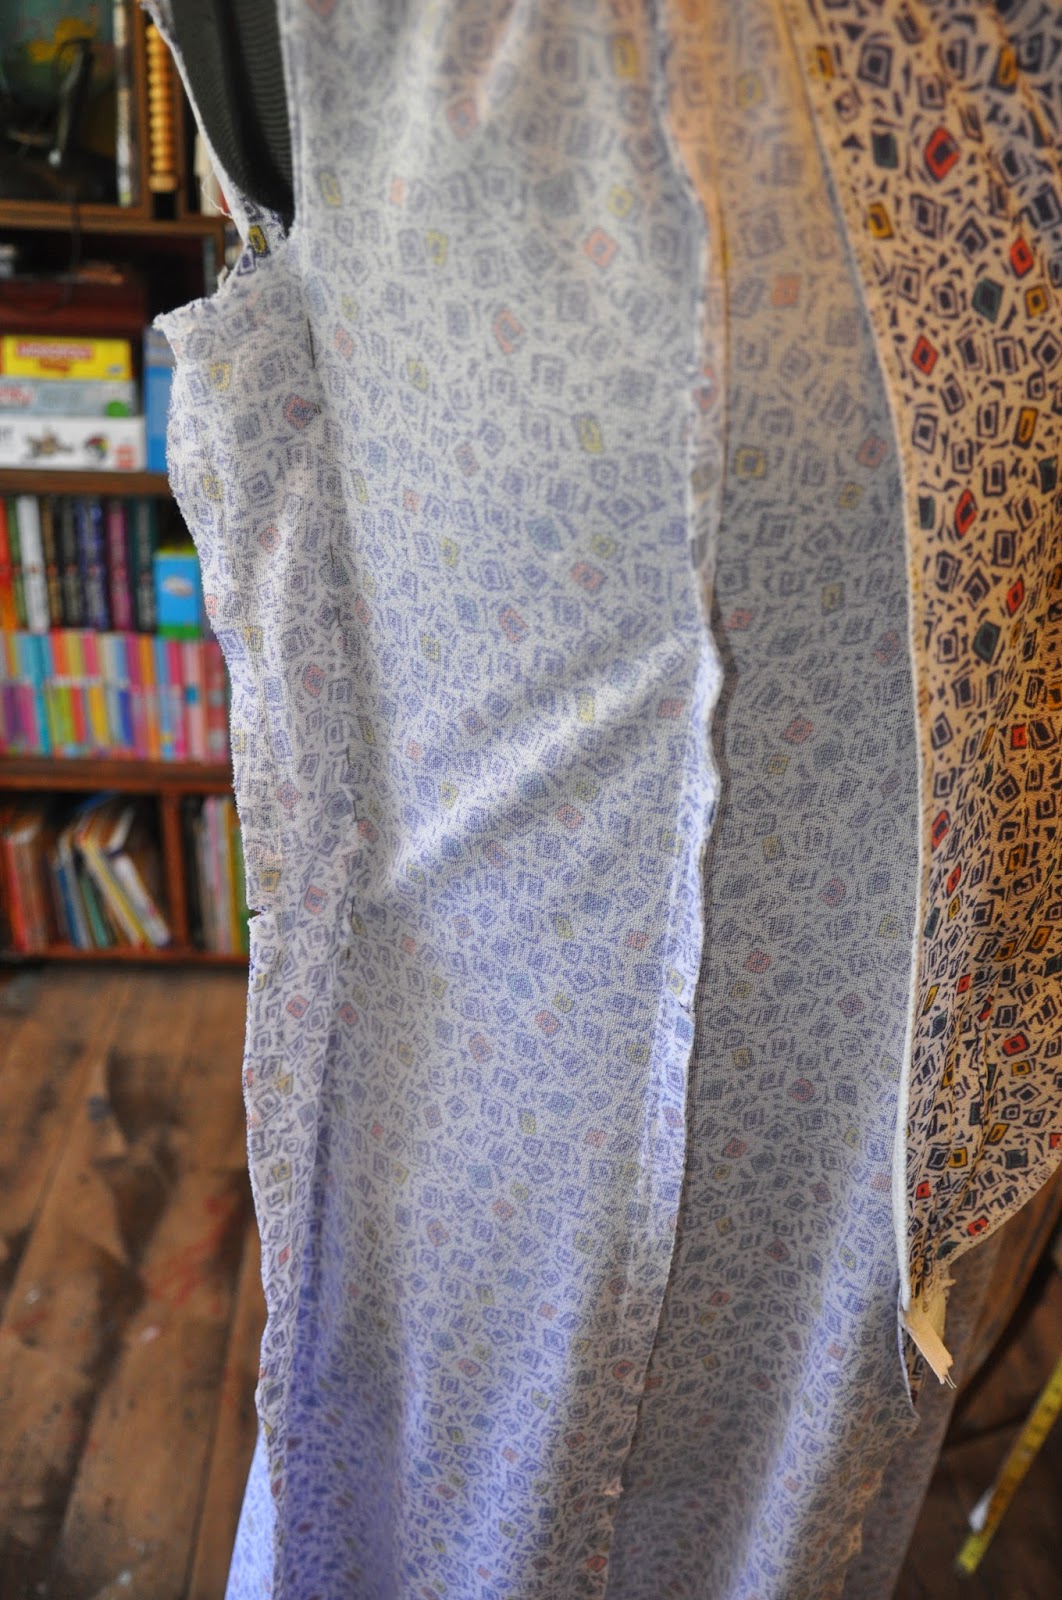


Then I turned it inside out and popped it on my dress form so I could alter the side seams for a better fit.


After sewing the new seams I cut this much off each side before finishing off the arm holes.


Then for a bit of detail at the top I folded these bits out to create a 'lapel', which I fastened in place with some yellow vintage buttons.


I don't know how these vintage dresses always seem to come with their matching belts after all these years in which they could have been lost.


I love the femine style of these old dresses, and the midi length is so much more practical than minis and maxis.


Like the photo process isn't trying enough without flying photo bombers.


I really do like this one, it is a shame that the polyester fabric will limit its number of wears to spring and mild summer days.

Dress: Trifted $5, Red shoes in after photos: Thrifted $4.


Thursday, 22 October 2015

Dressing down

Change of seasons always seems to increase my sewing quantity, so hopefully I'll be back on board again with regular posts after a bit of a lull in blogging activity.


This dress is quite something, I don't really have words to describe it...  it was just a little too 'dressy' for me, so my goal was to make it a little more casual .


I started by cutting off the cowl neck.


I then folded and pinned the cut edge inwards, and sewed it in place using a large zigzag stitch.   Some stretchy fabrics get a 'wavy' look when sewn, and I have found that sometimes sewing using a large zigzag stops this.


Then I chopped about 26cm off the hem to shorten the dress a 'midi' length.


After which I folded the cut edge over twice and pinned it in place.


And finished the new hem line off by again sewing with a really large zigzag stitch.


I think I managed to make it a little more casual... what do you think?


... those legs and feet have been without sun for quite some time. 


I also popped a thin black 'sash' around the waist to break the dress up a bit.


Dress: Thrifted $5, all other items I previously owned.

Wednesday, 14 October 2015

Whimsical Girls Dress

Where have I been?
I've still been taking on lots of projects, I just don't seem to have had the time or the energy to blog about them.  I also broke my last sewing machine needle a couple of weeks back, and didn't manage to get to the shops to buy new ones until yesterday.  But with my new needles, and warmer weather on the way, I thought today would be a good day to tackle a few of the 'summer projects' piling up in my sewing/homeschool room, and actually blog about them.


I picked this strapless womans dress up a couple of weeks ago, thinking it had the potential to be a nice girls dress or skirt.
I decided on a dress.


First port of call was to chop off that shirred elastic.


Then I folded the dress and half and chopped off a bit of fabric to create arm and neck holes.


See, kinda looks like a dress already.


I then hemmed the neck line and sewed the dress together at the two shoulder points.


But it was looking a little too sack like, so I made the 'bodice' part of the dress more fitting by chopping off these bits.


After sewing up those new side seems the arm holes became tiny.  So I made them bigger again by chopping off a bit more fabric before hemming them to finish the dress off.


Maybe this whimsical dress would have been better for my 8 year old.  But Miss 10 needs summer clothes more, and for now is happy enough to humour me and wear it because it is comfy and cool.


Chookies....


Ok I know this photo isn't amazing, unlike mulberry season, which is possibly my favourite season of the year (those are mulberries she is holding in case you were wondering why I was rambling on about mulberries),  but (back to the photo) it does display the finished dress quite well.


Childhood ramblings...
what a wonderful time of year where it isn't to cold and the mosquitos are not yet out in force.


Dress: Thrifted $4

Sorry my fonts are all over the place in this post, Blogger seemed to have a mind of its own today and I don't have the patience to work out why.

Thursday, 17 September 2015

Foray into Furniture...

Things have been busy lately, so despite having quite a few projects on the go I have been absent from blogland.

But last weekend I felt the deperate need to tackle (and actually finish) a furniture project after ongoing frustration with our too small 4 seater kitchen table.


I found this 6 seater table as a freebie on a local Facebook group a month or so ago, and had had it sitting in bits in my project room ever since.  

I didn't love it (or even like it for that matter), and initially I didn't plan on keeping it.  But it was the perfect solution to our small table dilemma, so a makeover was in order.


So I dragged the table out into the yard and gave it a good sand.


This gross looking jar is a vinegar and steel wool wood stain that I had had on the brew ever since I got the table.  Basically I stuck some steel wool and plain old white vinegar into a jar and left it to fester for a few weeks.  And once the table top was well sanded it was time to give the concoction a try.


I wiped it on with a rag, and it gave a natural aged look to the otherwise pretty bland pine table top.

NB: I would recommend wearing gloves if you are going to give this a try - my hands were stained a weird yellowy/brown colour for a couple of days after staining this table.


Once the stain had dried, we all mucked in and waxed the top of the table.


I used this wax that I got a few months back from Masters.

Once the table top was waxed it was time to move onto the legs.


I intended to paint them, so I had to sand off the high gloss vanish so the paint would stick.  But because the legs were turned, the sander wasn't really suited to this job, so I had to do it by hand :-(.


I attached the legs to the table and took it inside where I turned it upside down to make painting easier, and then undercoated the legs.


I wanted to give chalk paint a go because I had read so much about them on other peoples blogs.  But because I am far to impatient to wait for paint to arrive in the mail after ordering it on the internet, I decided to use the DIY bi-carb chalk paint method outlined on this blog here.

I used acrylic sample paints we had left over from other projects, and because I didn't want plain white legs on this table, I decided to mix up a light grey colour.


Once my acrylic white and black paints, and bi-carb were mixed together this is what my 'diy chalk paint' looked like.  


I did 2 coats of my chalk paint, and becasue the DIY bi-carb chalk paint tends to be a little grainy after the final coat I sanded the legs lightly (I didn't want to create a distressed look) with 'medium' grade steel wool.  

After the grainy bits were knocked off I applied 3 coats of the same wax I used on the top of the table to seal the paint (I followed the packet instructions and left 24 hours inbetween each application).


This is how the table looks now that it is finished, I think it looks much better...


The chairs are still a work in progress, and at this stage my 6 seater does not have 6 seats, but I'll get there eventually.

My 10 year old made the paper flowers in the old teapot, I think they are lovely and add a much needed burst of colour.


I wish that I had a lovely home to do this piece justice, but alas with us about to embark on some much needed major renovations, the house is looking pretty shabby... but hopefully not for too much longer :-).

I'm still not sure if this 'farmhouse' look is really my thing, but I think it looks pretty good for a freebie.