Friday 2 September 2016

Party at the Back

I finally managed a 2016 refashion.


I started with this thrifted $3 frock.


Unpicked the arms.


Took 3 inches off each side.


Turned it sideways and freehanded this curved hem, before I wizzed all those cut edges through my sewing machine.


In case you were wondering what happend to the v-neck; I also decided to make the back of the dress the front, as I prefered this round neckline.


Ta-da mullet top...


And in case you forgot what I started with, here is the before and after (getting my photo taken is still my least favourite part of this process ;-) ).


Tuesday 22 December 2015

Another floral dress refashion


Another floral dress...


This one had a mandarin collar.


A mandarin collar which was nicely lined in contrasting black fabric.  Perfect to make into a Peter Pan collar me thinks ;-)


So after pinning the collar down, I whizzed it through my sewing machine to stop it from popping back up.


This dress had been very poorly altered before, and as a result the side seams were fraying to the point that there were holes on the side seams of the dress.


So I re-stitched the side seams and trimmed off the frayed bits - making sure that the newly cut edges were finished off with a zigzag stitch so that they wouldn't fray again.


See, much neater...


Then  I altered the width at the top of the dress a little so that it is a little less sack like.


And finally, I wanted to balance out the black collar with a black detail at the waist.  Which I could have easily done by adding a black belt, but I find belts a little hot in the height of summer.  Soooo I decided to grab a piece of black elastic and sew the ends together (to create an elastic 'circle') so I could just slip it on over the dress (kind of like a belt, but looser).


And there you have it... another floral dress refashion.  

I've never come across sunglasses when op-shopping before, so I was pretty thrilled when I came across this vintage pair in perfect condition for only $2 recently.


The beautiful rock walls you can see in these photos were built by the former owner of my house who spent years working on them.  Some of the walls remain incomplete, and I have worked to repair and finish a few very small sections of them.  A task which has left me blown away by how much work went into building the quantity of walls that are located on our property.


Dress: Thrifted $4, Sunglasses: thrifted $2, Shoes/jewellery: wardrobe items.


And for my next project.... the Aussie equivalent of the American 'Christmas Sweater'


This dress actually doesn't look as terrible in the photo as it does in real life... ah well, lets wait and see if I can give it an overhaul before christmas.


Saturday 28 November 2015

Summer Dresses

I will start todays post with a non-refashion.


I bought this two sizes too big dress at the opshop the other day for $5.  Instead of taking it in, I opted to pop a $4 thrifted belt around it for a more flattering fit.  I'm pretty happy with not having to do any sewing on this one.

But moving on...


I don't know what possess me to buy these things sometimes...


Or maybe I do... this material felt nice and soft and cool, and with summer heating up way too quickly this year why not buy this $3 floral frock?


I'm not going through every step on this one, but this photo sums up this refashion pretty well.
I removed the following:
Shoulder pads,
Sleeves,
Collar,
Some width from the sides...


And then some length from the hem.


Then I hemmed it, and finished off the edges where I had removed the sleeves and the collar.


Then with the addition of a couple of belt loops, this dress was done.


Much better.


Oh so girly.


Dress: thrifted $3, Belt: thrifted $2, Shoes: wardrobe item.


Thursday 12 November 2015

Teeshirt and terrible photos

Things were chaotic this week at my place, so it wasn't until I had finished this teeshirt refashion that I realised the photos were all a bit rushed and not very good - but I think you will be able to get the gist.


I started with this.


Wide, with tiny tight sleeves.


I'm making it into a more fitting style, so I used this singlet as a guide.  I then sewed over those chalk lines...


and chopped these bits off.


I then took a little extra width off, and added a curve to the top of the shirt for a better fit.


That was pretty much it.


These photos are taken in our 'study', a space that is used by myself and my girls for sewing, craft, study etc.    It is a pretty chaotic space, due to lack of storage for our ever increasing book collection and sewing projects.  Hubby was nice enough to build a whole lot of boxes for me recently to help overcome the storage problem - you can see some of them behind me housing board games, books and a globe.


This is what my storage boxes looked like before they were loaded full of 'stuff'.  They were made from plywood offcuts and I spent a week finishing them off with a 'vinegar and steel wool stain', sealing them with estapol,  and making and painting MDF backs for them.  But back to the teeshirt refashion...

Teeshirts are actually really easy to modify as the stretch in them is fairly forgiving, and an extra bonus is they don't require the cut edges to be 'finished' because they don't fray.

Teeshirt: Old wardrobe item $0, Jeans: Thrifted $4. 


Wednesday 4 November 2015

Scarf to Dress Refashion


I traded this scarf with another stallholder at a carboot market a few months back.  


I love it, but it did tend to bunch up when I wore it, which I felt didn't do the lovely fabric justice.  I decided that because the scarf had so much fabric to work with, it had the potential to be a lovely dress.

Though I must admit I was pretty scared cutting into it - I didn't want to get this one wrong and ruin the material I loved so much.


First up I folded the scarf in half length ways to create a big rectangle.
At the top folded edge of this rectangle I cut a 'neck hole', which I carefully hemmed before the material started to fray.


After I had finished the neck off, I drew a basic dress outline, which I then cut and sewed to create my dress.
I will admit this stage took a bit of tweaking to get the correct silhouette on the finished dress, but I think it was well worth it - I'm pretty happy with this one.


This dress is a really sheer fabric so I have to wear something under it.  I'm wearing it here with a muslin tunic that I've had for years which is also too sheer to wear by itself.


The dress has just come out of the wash in these photos, so it is quite stiff looking around the hem, but it softens up nicely with wear, after which it falls with a softer look than what is pictured here.


I suppose this could be worn without a belt for a more casual look, but I like it this way.


And look how nicely it matches this old piece of costume jewellery.

Scarf refashioned to dress: $0, clothes swap, Belt: $2 thrifted, Necklace, tunic worn under dress, and shoes: all previously owned wardrobe items.

Wednesday 28 October 2015

Ugly Vintage Dress Refashion


Yep, I'm calling it - this dress is UGLY.   
But for some reason I could not leave the opshop without it.


On arrival home I also realised it was see through - don't worry I have shorts on under it in this photo.
 And to top it off it had a funky vintage aroma that would not come out in the wash.  But after a quick google search on 'how to get rid of old people smell from clothes', and a 24 hour soak in water and white vinegar followed by another whirl through the washing machine it smelt as good as a newie.


After the vinegar soak it was time to make some alterations.
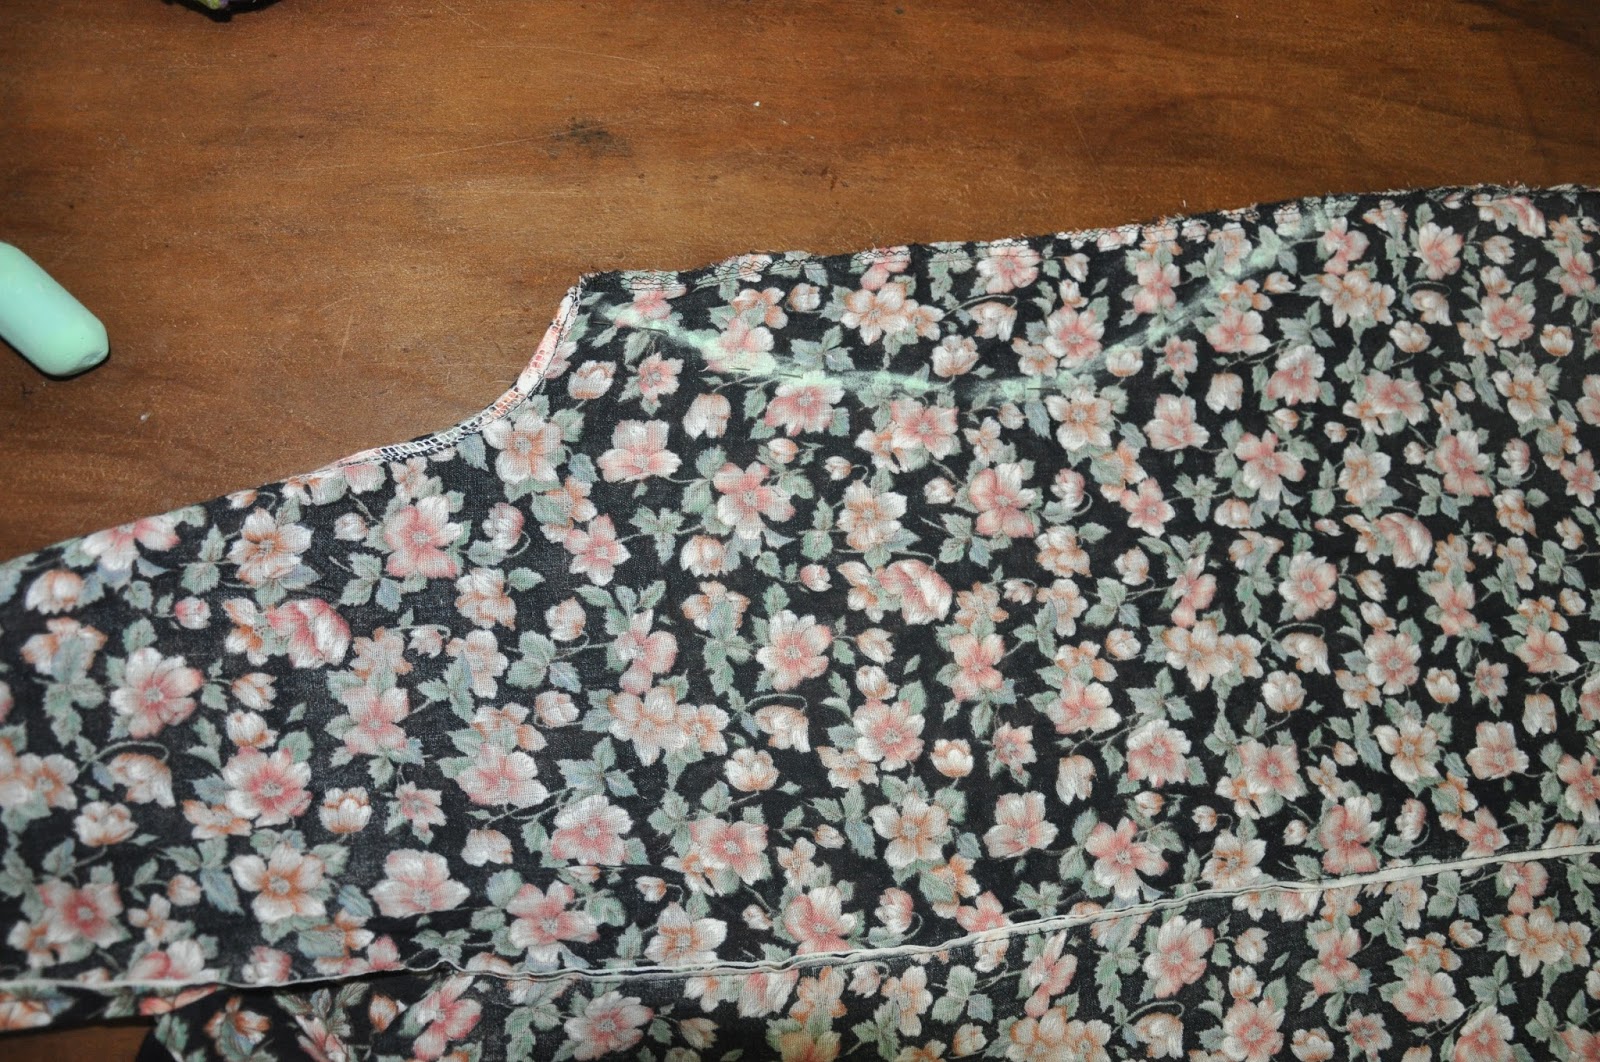
I look terrible in collars, so the collar was the first to go - which along with the sleeves were unpicked.


After unpicking, the two layers of fabric around the neck line were coming apart as you can see in the photo above.


So I pinned it like this before sewing it back together.


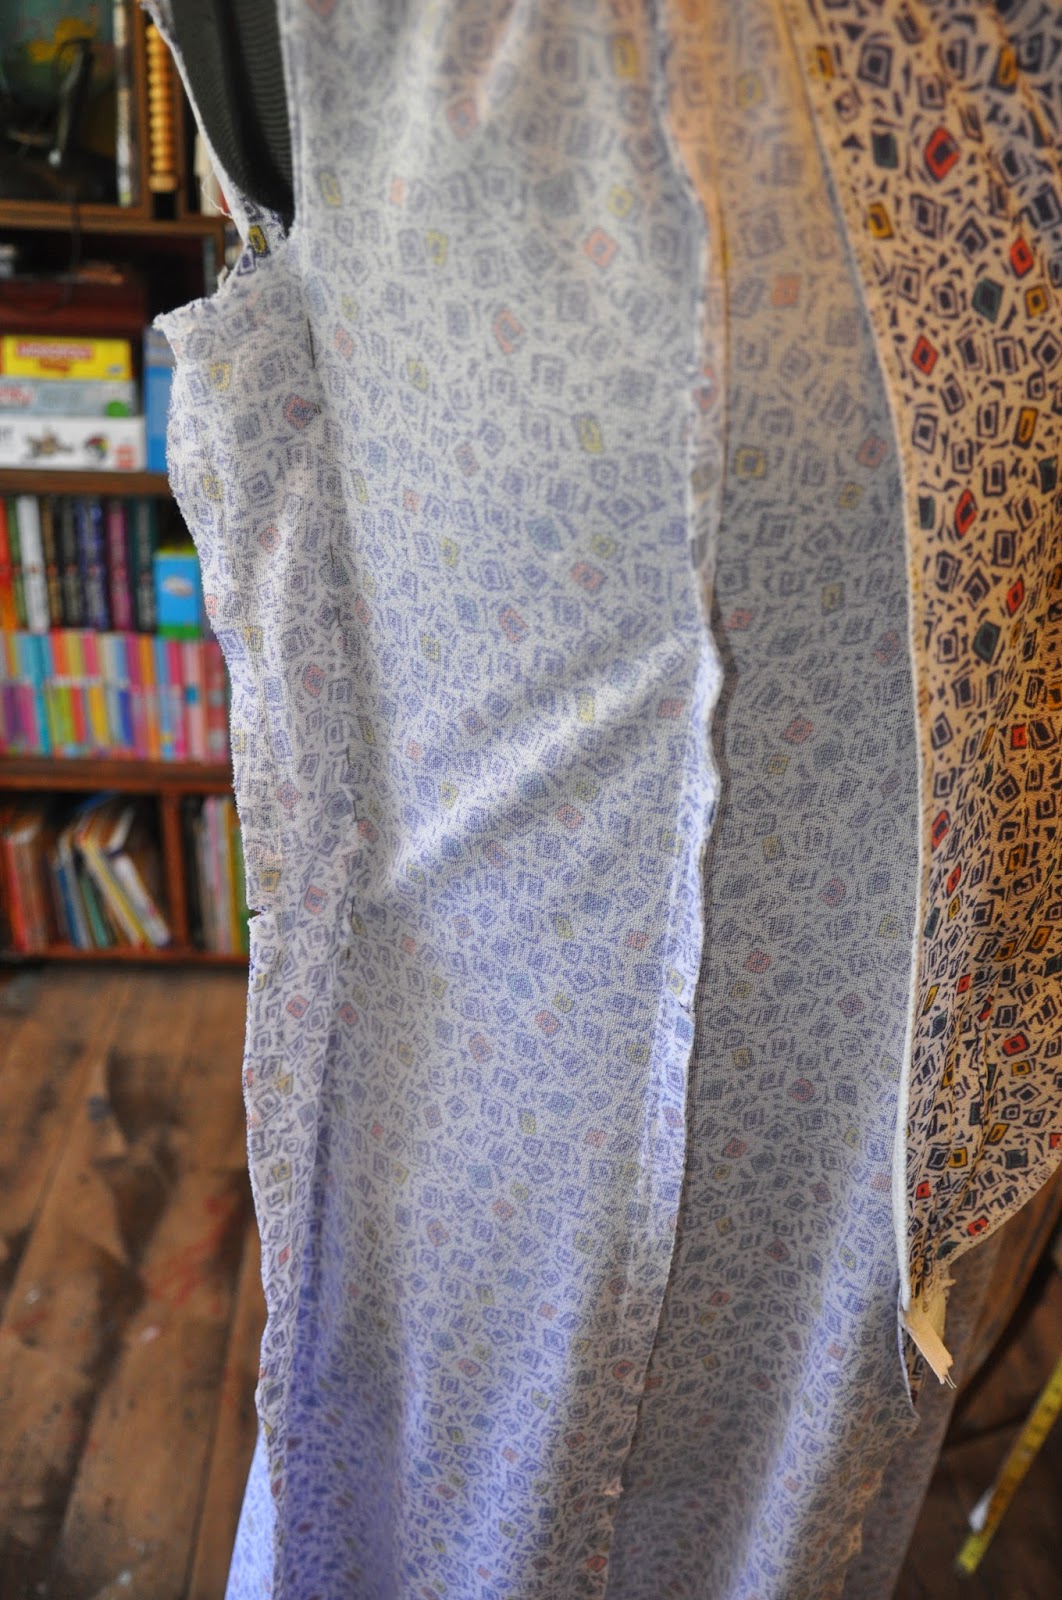
Then I turned it inside out and popped it on my dress form so I could alter the side seams for a better fit.


After sewing the new seams I cut this much off each side before finishing off the arm holes.


Then for a bit of detail at the top I folded these bits out to create a 'lapel', which I fastened in place with some yellow vintage buttons.


I don't know how these vintage dresses always seem to come with their matching belts after all these years in which they could have been lost.


I love the femine style of these old dresses, and the midi length is so much more practical than minis and maxis.


Like the photo process isn't trying enough without flying photo bombers.


I really do like this one, it is a shame that the polyester fabric will limit its number of wears to spring and mild summer days.

Dress: Trifted $5, Red shoes in after photos: Thrifted $4.